Ubuntu20.04にNginxをインストールしてWEBサーバ(http)を立ち上げる方法
WEBサーバを構築する際にApache(アパッチ)が主流でしたが、同じくNginxも多く利用されています。
今回はNginxでWEBサーバを構築しましょう!
環境
OS:Ubuntu20.04
ドメイン:change-domain.info
権限:Root
インストールを開始する
インストール開始です
root@ホスト名:~# sudo apt update 👈最新のパッケージへ更新する
Hit:1 http://jp.archive.ubuntu.com/ubuntu focal InRelease
Get:2 http://jp.archive.ubuntu.com/ubuntu focal-updates InRelease [114 kB]
Get:3 http://jp.archive.ubuntu.com/ubuntu focal-backports InRelease [108 kB]
Get:4 http://jp.archive.ubuntu.com/ubuntu focal-security InRelease [114 kB]
~~省略~~
Reading package lists… Done
Building dependency tree
Reading state information… Done
189 packages can be upgraded. Run 'apt list --upgradable' to see them.
root@ホスト名:~#
更新は完了しました。
root@ホスト名:~# sudo apt install nginx 👈インストールする
Reading package lists… Done
Building dependency tree
Reading state information… Done
The following additional packages will be installed:
fontconfig-config fonts-dejavu-core libfontconfig1 libgd3 libjbig0
libjpeg-turbo8 libjpeg8 libnginx-mod-http-image-filter
libnginx-mod-http-xslt-filter libnginx-mod-mail libnginx-mod-stream libtiff5
libwebp6 libxpm4 nginx-common nginx-core
Suggested packages:
libgd-tools fcgiwrap nginx-doc ssl-cert
The following NEW packages will be installed:
fontconfig-config fonts-dejavu-core libfontconfig1 libgd3 libjbig0
libjpeg-turbo8 libjpeg8 libnginx-mod-http-image-filter
libnginx-mod-http-xslt-filter libnginx-mod-mail libnginx-mod-stream libtiff5
libwebp6 libxpm4 nginx nginx-common nginx-core
0 upgraded, 17 newly installed, 0 to remove and 189 not upgraded.
Need to get 2,433 kB of archives.
After this operation, 7,891 kB of additional disk space will be used.
Do you want to continue? [Y/n] y 👈インストールするので「y」通し、Enter
Get:1 http://jp.archive.ubuntu.com/ubuntu focal/main amd64 fonts-dejavu-core all 2.37-1 [1,041 kB]
Get:2 http://jp.archive.ubuntu.com/ubuntu focal/main amd64 fontconfig-config all 2.13.1-2ubuntu3 [28.8 kB]
~~省略~~
Setting up libgd3:amd64 (2.2.5-5.2ubuntu2.1) …
Setting up libnginx-mod-http-image-filter (1.18.0-0ubuntu1.3) …
Setting up nginx-core (1.18.0-0ubuntu1.3) …
Setting up nginx (1.18.0-0ubuntu1.3) …
Processing triggers for ufw (0.36-6) …
Processing triggers for systemd (245.4-4ubuntu3.5) …
Processing triggers for man-db (2.9.1-1) …
Processing triggers for libc-bin (2.31-0ubuntu9.2) …
root@ホスト名:~#
これでインストールは完了です。
systemctl status nginxとし、Active:active(running)であればOKです。
root@ホスト名:~# systemctl status nginx 👈起動の状態を確認します。
● nginx.service - A high performance web server and a reverse proxy server
Loaded: loaded (/lib/systemd/system/nginx.service; enabled; vendor preset:>
Active: active (running) since Wed 2022-04-27 23:27:27 JST; 6min ago
Docs: man:nginx(8)
Main PID: 2613 (nginx)
Tasks: 2 (limit: 469)
Memory: 5.6M
CGroup: /system.slice/nginx.service
tq2613 nginx: master process /usr/sbin/nginx -g daemon on; master_>
mq2616 nginx: worker process
Apr 27 23:27:27 ホストのIPアドレス systemd[1]: Starting A high performance web serv>
Apr 27 23:27:27 ホストのIPアドレス systemd[1]: Started A high performance web serve>
lines 1-13/13 (END)
サーバーのIPアドレスを確認し、下記で確認します。ブラウザのURLに入力しましょう。
http://IPアドレス
このような画面が出ると思います。
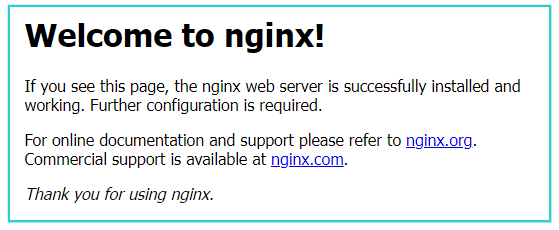
出ない場合はUbuntuのFW(ファイアウォール)が有効になっている可能性が高いです。
GoogleChromeでのアクセスした際は下記のような表示になると思います。

FWへ登録しているルールを確認する。
root@ホスト名:~# sudo ufw status 👈登録しているルールの一覧を表示する
nginxが把握しているリストを表示する
root@ホスト名:~#
root@ホスト名:~# sudo ufw app list 👈nginxが把握しているリスト
Available applications:
Nginx Full 👈ポート80と443を開きます
Nginx HTTP 👈ポート80のみを開きます
Nginx HTTPS 👈ポート443のみを開きます
OpenSSH
root@ホスト名:~#
root@ホスト名:~# sudo ufw allow 'nginx full' 👈追加します。
Rules updated
Rules updated (v6)
root@ホスト名:~#
root@160-251-51-140:~# sudo ufw status 👈FWのステータスを確認
Status: active
To Action From
-- ------ ----
80/tcp ALLOW Anywhere
Nginx Full ALLOW Anywhere
80/tcp (v6) ALLOW Anywhere (v6)
Nginx Full (v6) ALLOW Anywhere (v6)
root@160-251-51-140:~#
これでWEBページは見れるようになったと思います。